(10/14/08 Ves Sladin)
There it is... The Ves Sladin R1150R Custom seat. Not too shabby for a first reupholster job... If you want to see how I did it, read on...
Some history. I had a green 2004 R1150RA with the standard (low) seat. I didn't like it because even though the seat was reasonably comfortable, it was sloped forward, which meant that I was constantly in a state of sliding forward, and everything was bunching up. Only way to avoid that was to sit more toward the front of the seat, but there the padding was thinner and there was less seat, so the pressure was just too much. I fixed that problem by jacking up the underseat mounts by just over an inch. This flattened out the seat and allowed me to sit back without sliding forward. I still wasn't entirely happy with it, but it was comfortable enough to do five 600 mile days in a row. Good enough.
Well, as fate would have it, on that fifth 600 mile day, that bike was totaled due to a rear end collision at a stop light. God rest it's mechanical soul; it served me well while I had it.
Considering my options for a replacement, I concluded that only another R1150RA would do. Sure enough, about the time I was looking, a beautiful 80th anniversary model showed up on Craig's List, and the rest is history. Ohlins suspension, short paralever arm, and head guards made it complete.
![]()
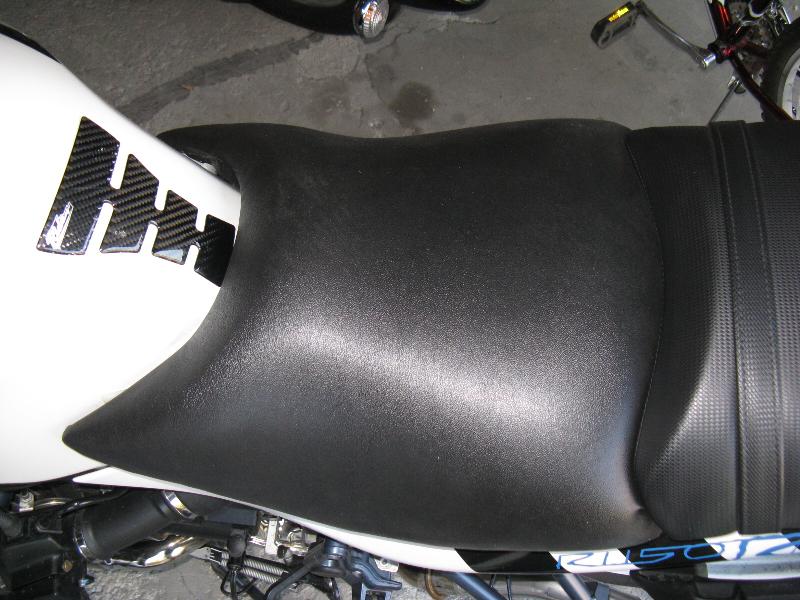
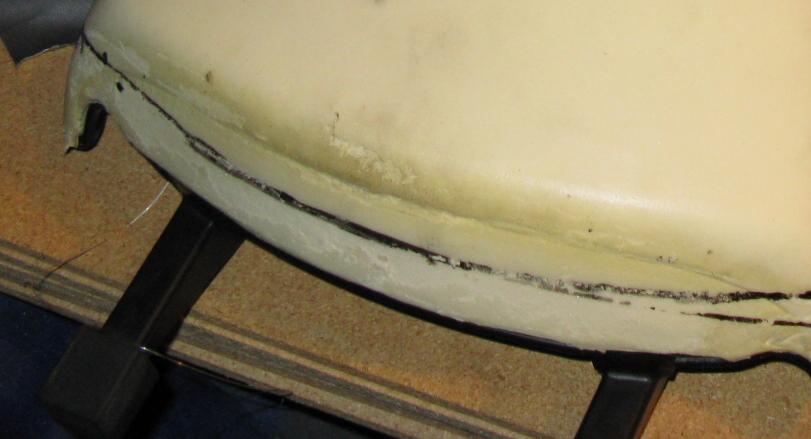
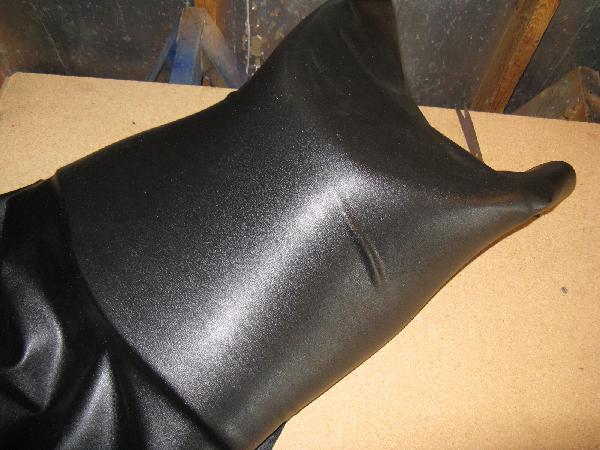
One difference between the two bikes was the seat. The new one had the "tall" seat, which I thought would be great since I'm 6' 3". Well, good idea but crappy execution on BMW's part. Turns out the seat is taller by about an inch, but it's still sloped, and the seating area is actually SMALLER (take a look at the photo above, there's a whole lot of side to the seat but actually very little seat). Also the seat foam seemed harder, but maybe that's just because of the decreased seating area. I suppose the side cutouts, which cause the top of the seat to be narrow, are there so a person can reach the ground. Hello? If I buy the tall seat it's probably cause I'm tall, and I don't need cutouts to reach the ground. Anyway, I did jack up the seat mounts again, and that helped, but the seat was still way more uncomfortable than the "low" seat. So, seeing as I'm practically a rocket scientist (Engineer), and making seats did not seem to be rocket science, I decided to tackle it myself. This is my account of that seat reconstruction.
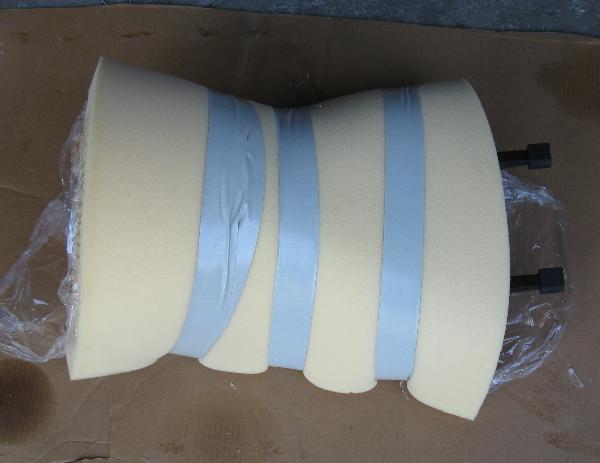
The list of main raw materials is pretty short; foam, vinyl, and adhesive. I went online, found Rochford Supply, ordered, and a few days later the materials showed up on my doorstep.
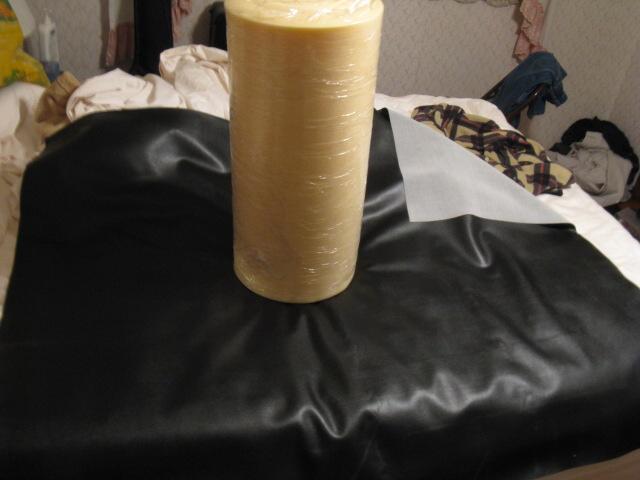
The vinyl was a high grade non-slip material meant for outdoor use. The foam was a two-inch thick, 4.1 lb/ft-cube density, intended for firm seating. They did have an extra firm which, if I recall was over 5 lb/ft-cube. I've also since found that custom seat makers tend to use rebond foam, which is like carpet padding (made from bits of foam that are then glued together) and seems to run 6-8 lb/ft-cube. If you're trying to create a bucket, you'd want to use rebond foam because it's very firm and will hold an edge better.
One of the first things I did was to take two small pieces of foam and glue them together with the adhesive to see just how well the stuff held. Turned out to be a very strong bond. You spray the two parts, let them get tacky, and then stick them together. The foam will rip before the adhesive lets go.

Before I did anything else I gave a lot of thought to what I wanted to do. When I'm sitting on the bike I feel like all the pressure is distributed on maybe a third of my butt. The sides get no support. Also, my thighs get no support. Also I noticed that the pressure is decreased on my butt if I bring my knees slightly up and grab the front of the seat with my inner thighs. And of course I needed to be able to sit where I want without sliding forward. When I took all this into consideration the answer seemed obvious; level the seat out and then just cover the whole thing with the two-inch foam. This would make the seat wider to give me more support in the rear (distribute the load over a larger area). Also, the extra width in the front would give me additional support in the thighs. Basically it would be more like a horse saddle. I tested this out by just throwing a piece of foam over my seat and sitting on it. If felt good and I was off.
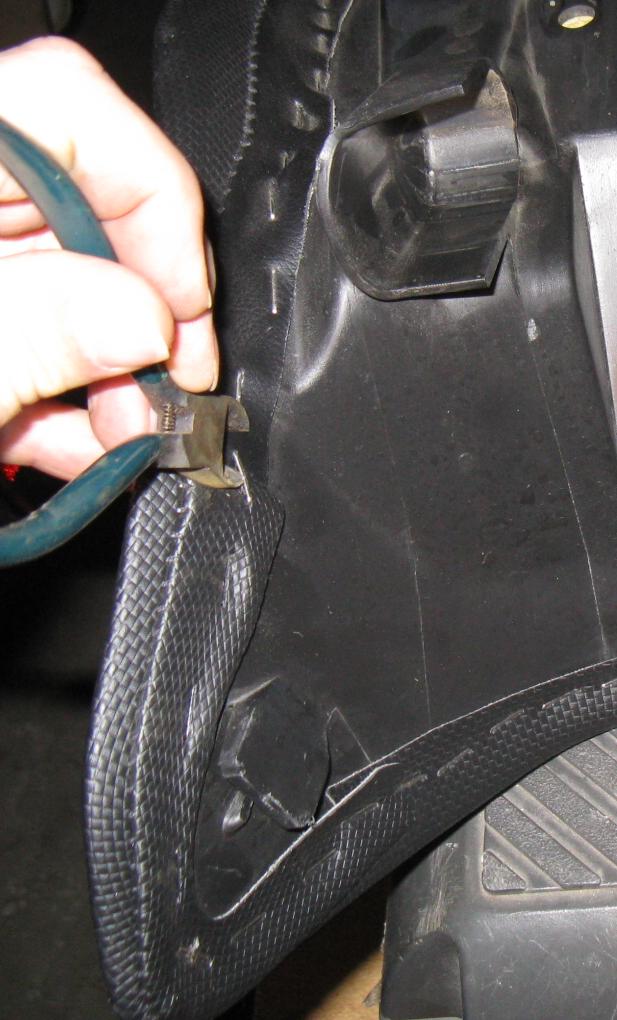
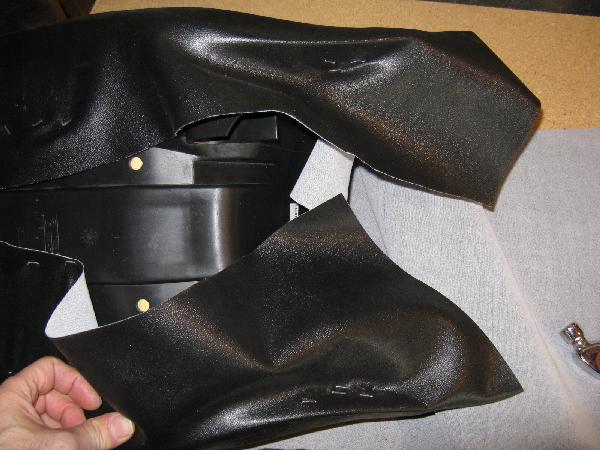
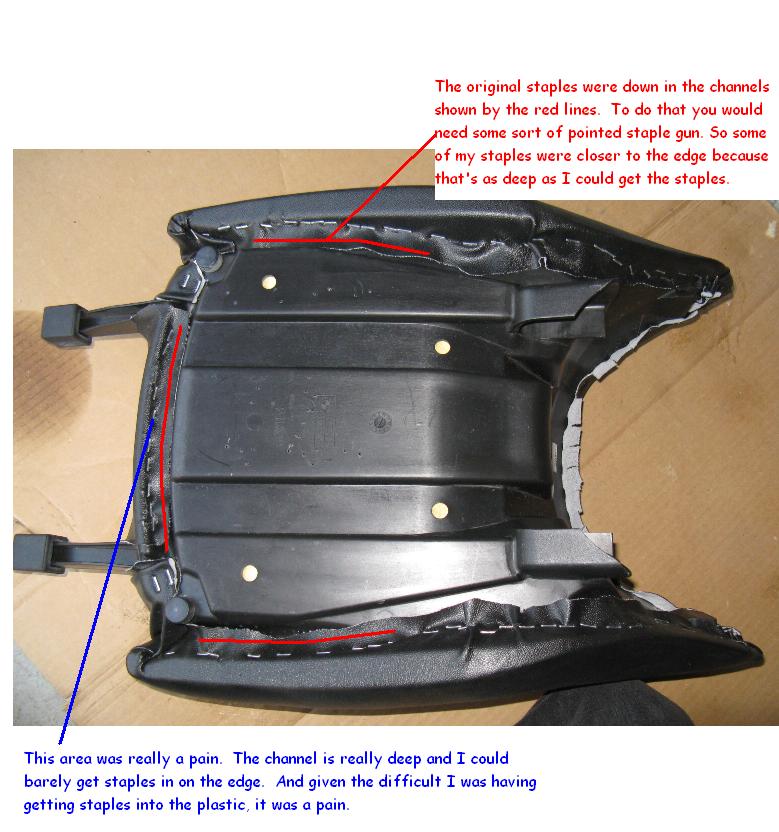
First, take the seat off and remove all the staples holding on the vinyl. I used a small pair of small side cutters to both pry and grab and pull the staples out. Some of the staples were in strange locations... deep down in channels... makes me wonder how I'm going to staple a few of these spots. I was surprised that the staples were just plain staples, like you'd find in any office stapler... nothing industrial strength. But there sure were a lot of them... one next to the other in several places.
In the photo above you can see that there is extra vinyl stitched to the main seat cover. That's to avoid puckers as the vinyl goes around the sharp corners. After removal the vinyl cover measure to be about 23" by 23", irregularly shaped. I'll need a bigger piece when I do the cover. I did notice that the vinyl on the seat was a little heavier than the material I had purchased.

And thar she be, nekid as a Jaybird.
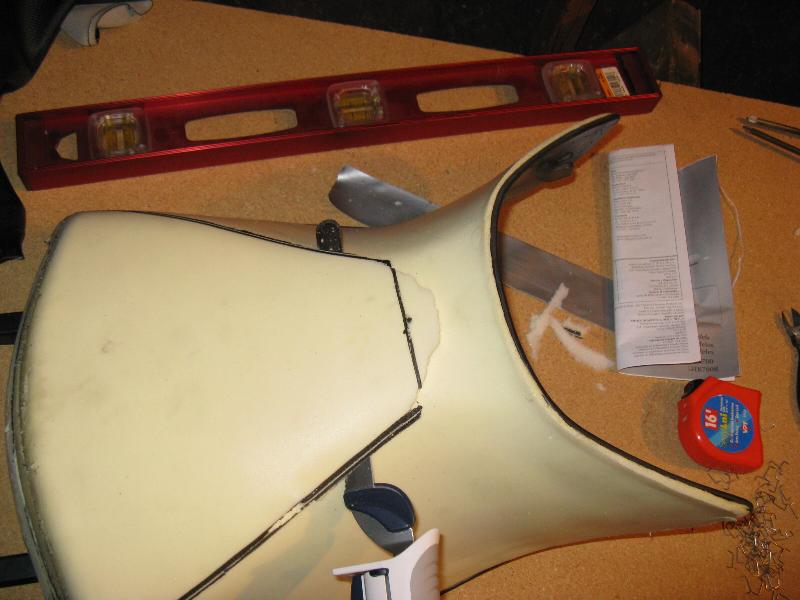
Next step was to put the seat on the bike, put a level on it, and figure out how much it slopes. This is how much material I will have to remove from the back to level it out.

One inch would do it. It's also interesting that the front lip of the seat is exactly level with the rear of the seat.

Starting at the back I marked off one inch, in the center of the seat, down from the top, and then attempted to project that line across the whole back of the seat. That was not easy, because I'm trying to put a level line on a surface that has multiple curves to it. A laser level would have come in real handy.
The next step was even trickier. I had to extend two lines going forward to the low point in the seat. Here's what it looked like when it was all marked off.

The double lines are there because I did this using a fishing line as a guide. First I marked a straight line at the low spot of the seat, then I taped down fishing line at the end point of the line, and stretched the fishing line to meet the marked line at the back of the seat. Then I just went over the fishing line with a permanent marker. Notice the electric carving knife next to the seat. That's the next step, cut off the section of seat, starting at the two back corners and making sure the knife is traveling along two lines at one time. The knife was $9.00 at Walmart and has a nine inch blade. A twelve inch blade probably could have been better.

When I got to the point where I couldn't see the other end of the knife any more then I peeled back the foam that I was cutting and kept it level as best I could. And here's the rough cut.

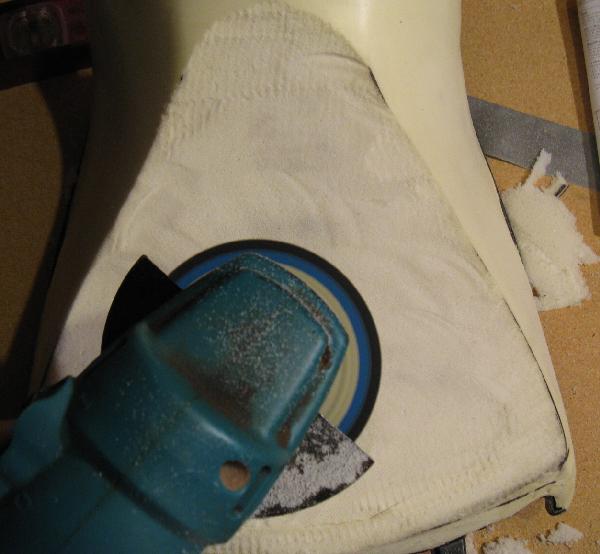
I cleaned it up as much as I could with the knife and then took a sanding disk to it. The disk needs to be fairly rough and then run on some concrete first to take off most of the high points. Foam doesn't need much to take it off.
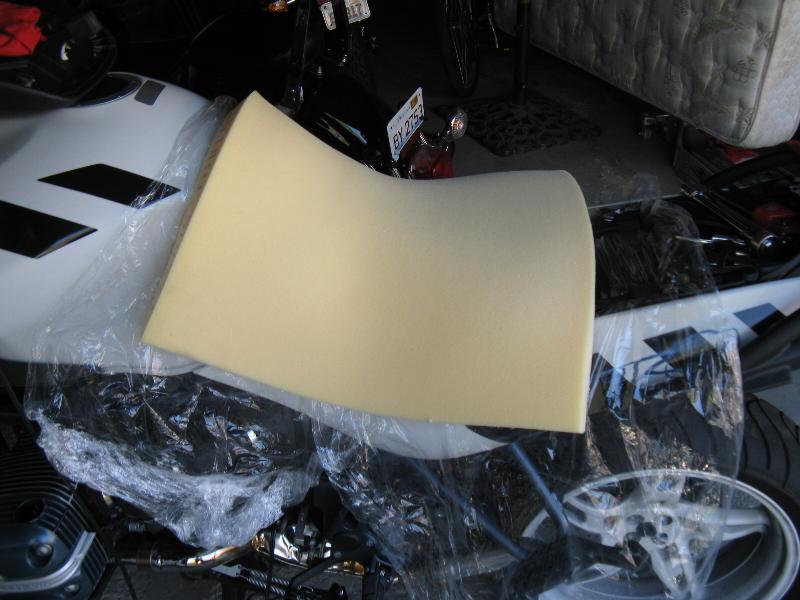
Not bad... doesn't have to be perfect. I then masked off all the exposed seat-pan plastic to protect it from the adhesive spray.

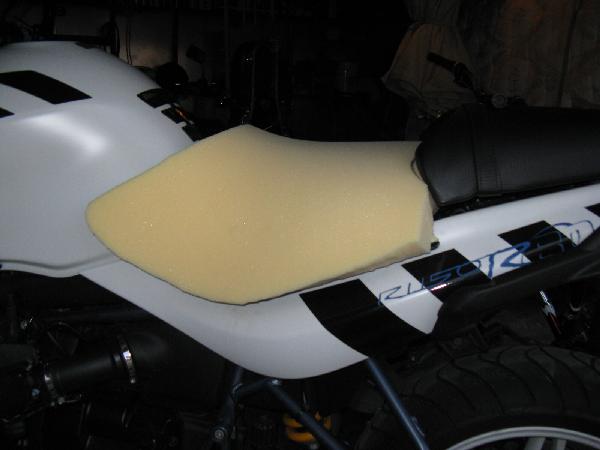
There are several steps missing here because I had to work fast. First, I covered the bike with thin plastic around the seat area, then I put the seat and the extra piece of foam on some flattened boxes. I sprayed both the seat and the foam with two coats of adhesive. I then removed the masking tape off the seat (probably should have used masking take instead of duct tape (next time)). I put the seat in place on the bike with the plastic under it. Then I lined up the new foam to the seat, and pressed it on. Of course it stuck to the seat and any foam that was overhanging the seat stuck to the plastic (NO ADHESIVE ON THE BIKE!). Here's what it looked like at that point. Dang, looks like a saddle.
I actually sat on it to make sure the foam stuck together. Then I took it all off and wrapped it with duct tape (adhesive side out) to continue to put pressure on it.

When I figured it was sufficiently stuck together I took off the tape, ripped off as much of the plastic as I could, and used my carving knife to carve around the seat. I also outlined where the passenger seat fit in so that I could angle cut the back of the seat to fit.

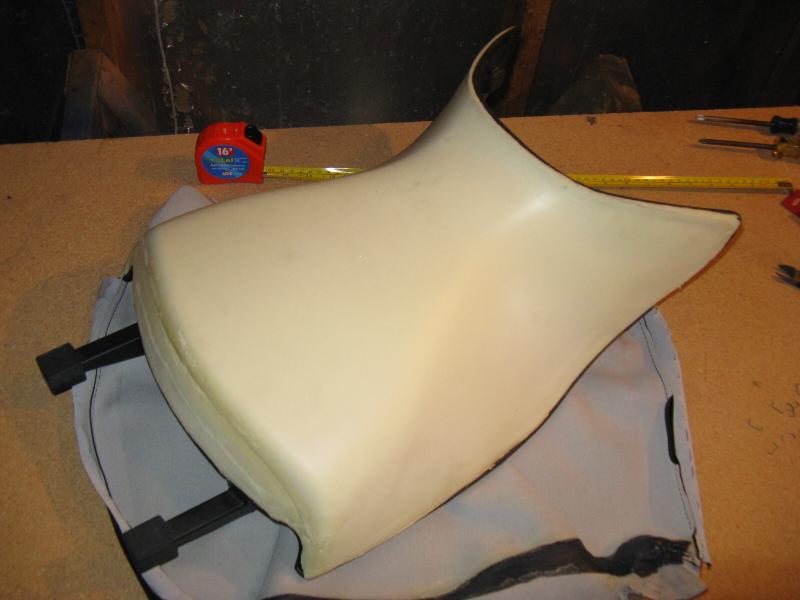
And here it is basically cut to shape.
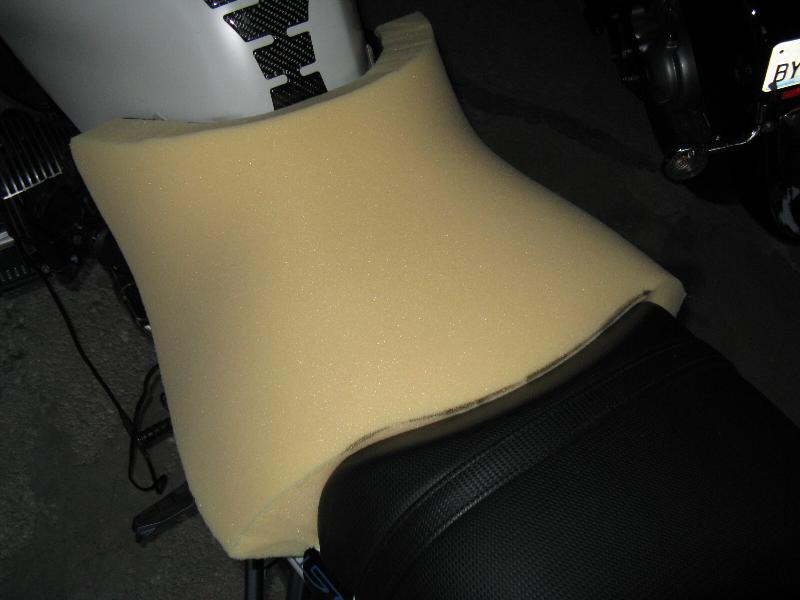
I sat on this baby, and man did it feel good. My butt is supported, my thighs are supported, and I can still touch the ground. I am one with the seat.
Ok, now covering it with vinyl. Actually, before I covered it with vinyl I trimmed some foam off the sides (sorry forgot to take a picture of that). Anyway, I laid the seat on the vinyl, made sure to cut a big enough piece that I would have a lot of hangover and then I stretched it around the seat and tacked it down. First in the center and then the front corners. I used an Arrow staple gun with T50, 3/16" staples.

Even with just the tacking, the seat already looked good.
At this point it was just a pain in the butt. The main problem was that the seat pan is so hard that a lot of the times one side of the staple would go in and the other would go sideways. So, had to take it out, do it again. The other problem was the recoil. The staple gun caused the seat to move every time it actuated, so I had to make sure I had something backing up the seat (in this case I used the scrap vinyl thrown over a small stool or a 2x4) and I had to press, with the staple gun, against the support, with all my weight to keep the staple gun from moving during impact. It was definitely a two man job, but I managed.
And here's what it looked like after it was stapled and trimmed.
Since I wasn't doing any sewing, the rear of the seat looks rough. There's no way to avoid the gathers with one continuous piece of vinyl. But that's hidden by the passenger seat anyway.

That's it. The finished product is at the top of the page. Sitting on it feels really good. Can't wait to ride it.