Installing Ohlins on the Rockster (4/25/08)
Part 1: Installing R1150R Shock on the Rockster Because That's What They Shipped Me !
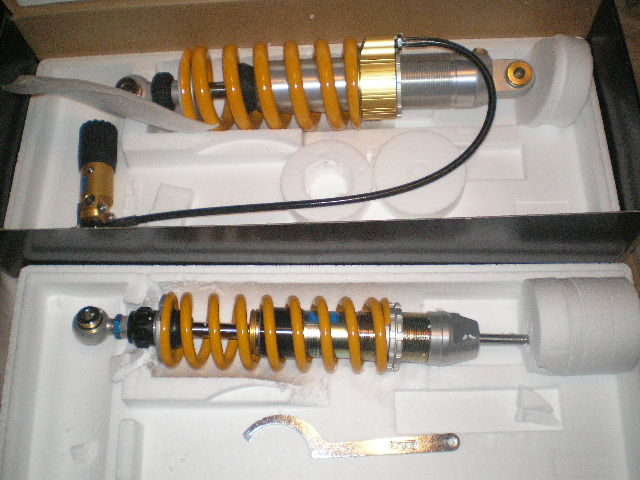
There they are... things of beauty... it's almost going to be a shame to put them on the bike and get them dirty. On the other hand...Can't wait!

Got them from Kyle Racing. Good price and quick delivery, can't ask for more.
I tackled the rear first. Put the bike on the center stand, take the wheel off and support the swingarm with some wood.
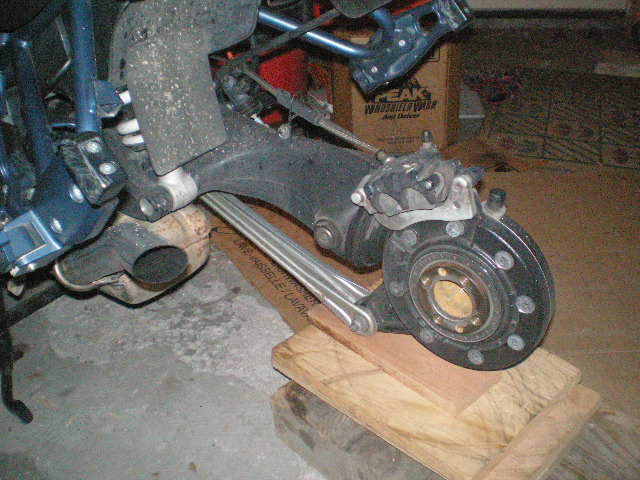
Loosen the top bolt... yeah, you'll need a wrench on the other side to keep it from turning. Basic stuff.
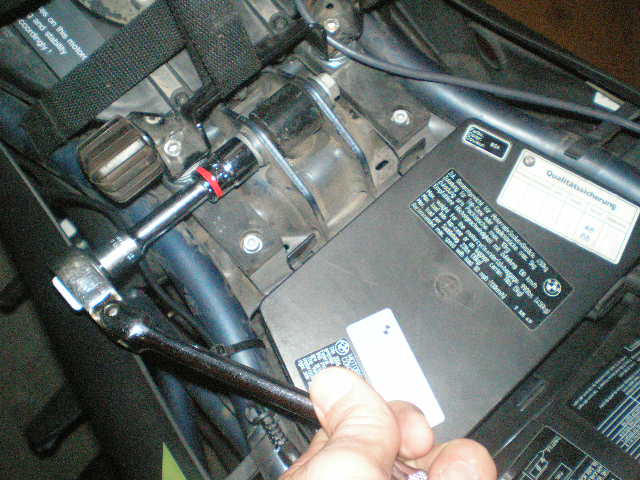
Remove the remote preload adjuster.

Remove the bottom bolt.

And the shock pretty much drops out.

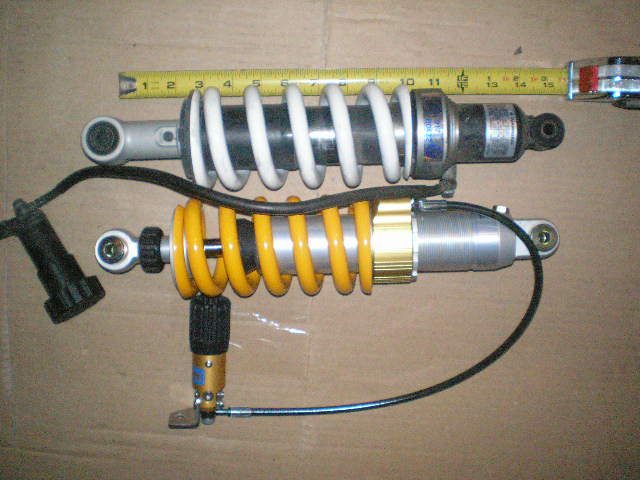
Hmmmmm.... surprise! The Ohlin's looks shorter. This picture is actually amazing... Pictures don't lie? This one sure is lying. Perspective is off. Problem is tape measure is lying on the ground, so it's further away and the Ohlin's spring diameter is smaller so they're not at the same level lying down. The stock shock measures 14.5" bolt center to bolt center (I just went and remeasured it). That's 368 mm. The Ohlin's is 366 mm. Given my measurement error... I'd say 4-5 mm shorter. About .20" shorter at most. I was hoping it would be a bit longer.
I slipped the shock in and finger tightened the top bolt then checked the preload adjuster for fit. First problem is that at the angle that the line comes off the adjuster it's touching the spring coils. Need to change that angle.
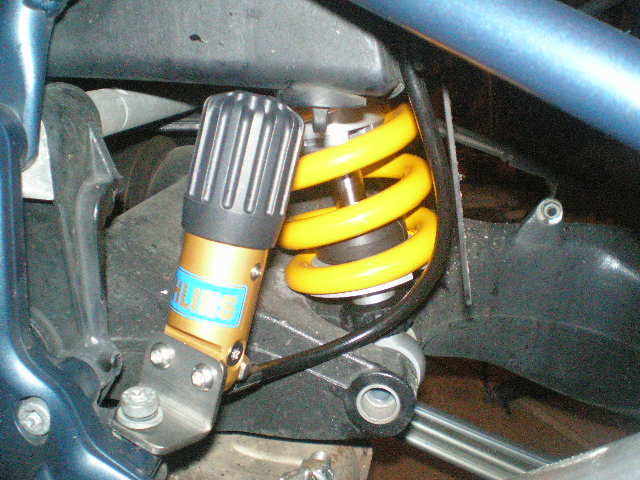
So, I loosened the banjo bolt just enough to be able to pivot the adjuster line (obviously you don't want to do it a lot, cause you'll get fluid leaking out or air in the line). I left it just loose enough that it takes a decent amount of force to actually move it... for final adjustment.
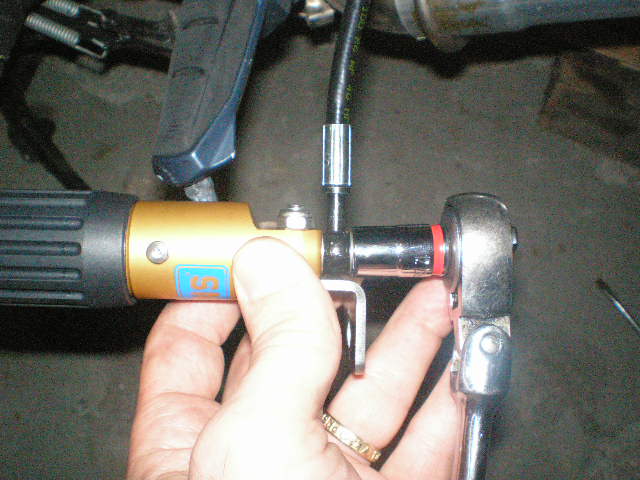
The other problem was that I couldn't get the bolt in that holds it down. The bracket on the bike has an indentation where the adjuster bracket sits. If I put the bracket in the right location then the hole is just slightly off so it didn't allow me to get the bolt in. So, I drilled it out with a 3/8" drill (approximately next size up from the existing hole).

That will do the trick. But now I had the line too far out from the shock.

So, pushed it toward the shock a little more and tightened it up all the way. Made sure everything was torqued down and that's it.
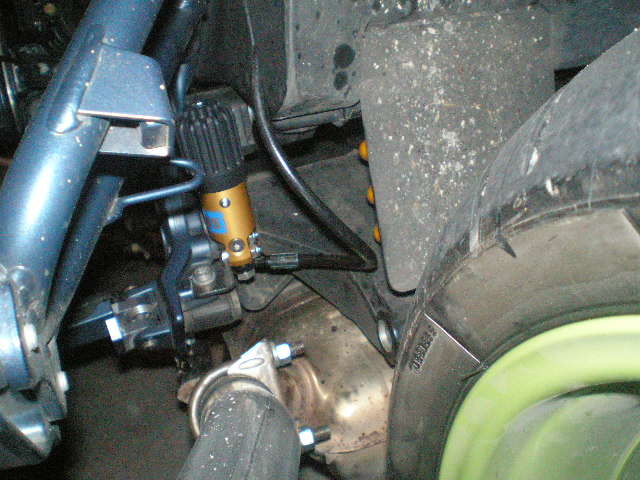
Then there was the front. First I piled some wood under the front end to keep it up when I took the shock out.
Then I started taking the top nut off using an allen wrench to hold the shaft from turning. As I was doing this I realized that the front end was pivoting back, not forward... No gas tank to weigh it down.
So, stuck a board under the rear wheel to keep the weight off the nut as I was screwing it out. Take note... that's a 3/4" thick board and it just slides under my rear wheel..
Then I looked at the bottom of the shock. What the heck is this? Looks like some sort of reverse torx head on the bolt. Hmmmm... where did I put my reverse torx head tool... NOT! Would it have been so much more difficult to just put a regular head on that bolt?
I just used a wrench to hold it from turning while I took the nut off the other side. Tight quarters.
The bolt needed a little persuasion to come out of the hole... long allen wrench.
I then took the rubber bushing off at the top mount, which gave the shaft more room and allowed it to pivot more, and then pulled the shock forward at the bottom ... Hey, doesn't come out. Got rid of that board under the back tire to allow the front forks to extend... still doesn't come out... dang horn is in the way... unbolted the horn and that was enough room to pivot the shock forward at the bottom and get it out.
Well, guess what, the Ohlin's is longer. Also, the blue nut at the bottom is a ride height adjuster. I'm going to assume Ohlin's knows what they're doing and that they intentionally made the rear shock a little shorter and the front one noticeably longer, by about 3/8 inches.
I was playing with the two shocks. I could actually get the Ohlins to compress slightly by hand. I could lean on the stock Rockster shock with most of my weight and not budge it. It's either a lower spring rate or there's practically no stiction (no resistance to movement from a stationary position; static friction, as opposed to dynamic friction, which is measured when something is already moving). I other words, it's reacting to even the slightest changes in pressure. Wow.
Put the washer and rubber bushing from the old shock on the top of the new shock... insert at top... pivot bottom.....Hmmmm... longer shock... doesn't fit in same space... Doh! Ok, what are my options... Put the old shock in, stick something under the center stand, that way when I take the old shock out, the front will drop further down... No... I know!... take the rear wheel off... tilt the bike back on the center stand... let the front extend more... and slip the shock in... ya ya...
Ok put support under swingarm to limit back tilt... take rear wheel off...
And it's in... still had to push on it just a bit to compress the spring and get it in over that crossbrace...
Hmmm... preload adjustments will be a bear... the adjuster rings are up above the horn... the horn and the entire bracket will need to come out to even have a chance of getting a decent twist on the rings.
Oooooops... slight problem... back end is so far down that I can't get rear tire on... Ok... carefully lean bike to one side and kick a board under one center stand leg... lean to other side... kick a board under other center stand leg... now it's high enough to get the rear wheel on...
Back to the front... torque down the bolts... Doh! Torque wrench doesn't fit in space... get a really long extension and go through the A-arm...
Doh! Can't use an allen wrench on the shaft... have to use the old two wrench approach. Can't use a torque wrench either. I'll have to go get a box end wrench attachment for the torque wrench to finish the job. For now the old two-wrench-approach will have to do, and tight enough is tight enough... no need to fret... my arm is calibrated by the National Bureau of Standards.
I get the bike off the center stand and boards... put it back on the center stand... WOW getting it on the stand was REAL easy.... Ya... on the center stand there is no space between the tires and the ground. Keep in mind that I do have the short paralever arm installed on my bike, so the rear is hanging down more than it would on a stock setup, but even though I gained some room at the rear with the slightly short rear shock, the front is that much higher that it took up (pivoted the bike back) all 3/4 inch of the free space I had. Disadvantage is going to be it will be easier to knock the bike off the center stand, and when ever I want to be able to rotate my wheels, or take them off, I'll need to put a board under the center stand. Advantage should be more ground clearance for the jugs when leaning. I can live with that.
Took it out for a ride. Wow, quite a difference. It's difficult to describe, but basically the harshness is gone and from what I can see of the front suspension, it's working a lot more than my old shock ever did. It's moving up and down when I don't even see any bumps in the road and when a noticeable bump comes along it just soaks it up, rebounds, and drama over!. Geeeeees... I use to get my teeth shook out over bumps like that. I was intentionally going over some of the sharp edges where winter had buckled the asphalt. Nooooo problem. Did some swerving back and fourth between the lines in the road. Handles good. Maybe not quite as sharp as it was (it was very sharp with just the short paralever arm), but still very flickable. Did some S curves... no problem, tracks well, seems to absorb mid corner bumps well... maybe just a tad soft... may need to increase the preload and rebound.
That's about it. I'm going to send an email to Kyle and ask him about the difference in shock length, the spring rates, etc.. see what he has to say about it.
Looking forward to the next long ride to get a really good feel for it.
4/27/08 Update
Well, didn't go for a really long ride, but I did take the bike on one of the bumpiest roads I ride on... It ends by going around a bumpy corner right into a stoplight... so you're braking, cornering, and hitting bumps at the same time. It's a new bike. Noticeably different in how it reacts to all that suspension overload. Amazing. Those shocks are worth every penny.
4/28/08 Update
So Kyle called me up and checked to see if all was well. We talked about the shock length and the spring rate. To make a long story short, Ohlins sent me the wrong shocks. The R1150R takes the BM050 and BM049, the Rock takes the BM350 and BM349. Yup... So, now, I have to do the installation again. Good thing is they will get with Ohlins tomorrow and get the new shock shipped out before I even return these.
Interesting part of the discussion was talking about shock length. Kyle pointed out that Ohlins uses a topout spring (not sure if in some or all) in their shock. So, rather than the piston coming to a hard stop on extension, it acts on a spring. The interesting point is that in that case the length of the shock when it's unmounted, is not really the fully extended length, and as you crank on the preoload, the shock will actually get longer, because you're compressing the topout spring at the same time.
Stay tuned..
Part II: Removing the Ohlins I Never Should Have Put On! (4/29/08)
So, now that we've established that R1150R shocks will fit on a Rockster...
This time I got serious. Enough of this center stand stuff. I used my handy dandy motorcycle jack:
Then, as one of the guys on R1150R.net pointed out. The stainless steel brake line on the front is short and prevents the wheel from extending. THANK YOU! Can't believe I didn't notice that. So, this time I took the relay off the frame to get some more slack.
By the way. Same is true in the rear. If you leave the rear brake caliper on the swingarm, you can't drop the the swing arm too low or it will pull on the brake line.
Removal of rear shock was no problem. And the extra fork extension gave me plenty of room to get the shock out, even with the horn still in place. Doh! Lesson learned.
That took me all of 55 minutes. Now wait for the new Ohlins... tap tap tap tap tap... Here yet? No, I haven't put the old shock back on. The bike is jus sitting on the jack in the garage. It's cold and rainy anyway, so I'll just wait and save myself the trouble.
4/5/08 Part III... They're Heeeeeere!
Well, the part numbers are right....

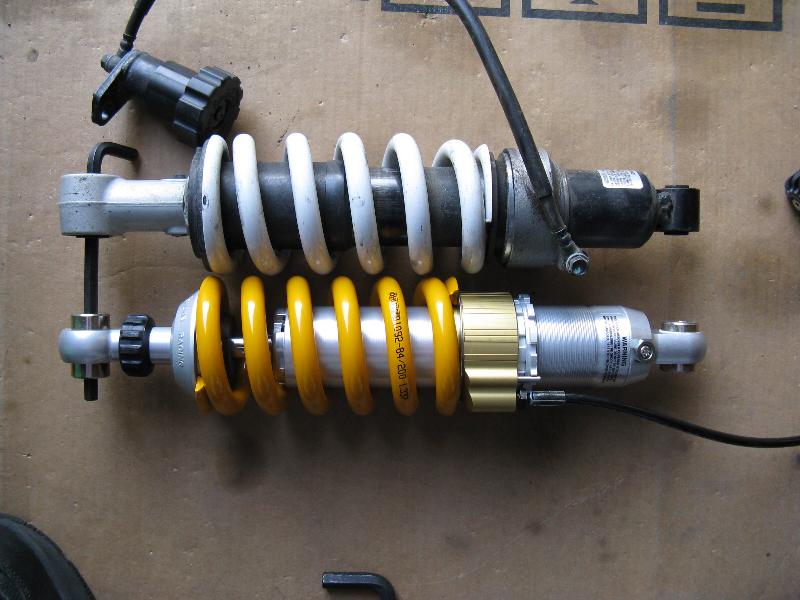
Let's see how they compare... the Rockster shock is on top, R1150R on the bottom... Looks like one less coil... a little bit shorter, but the length adjuster is screwed in more... so I have more length to go...
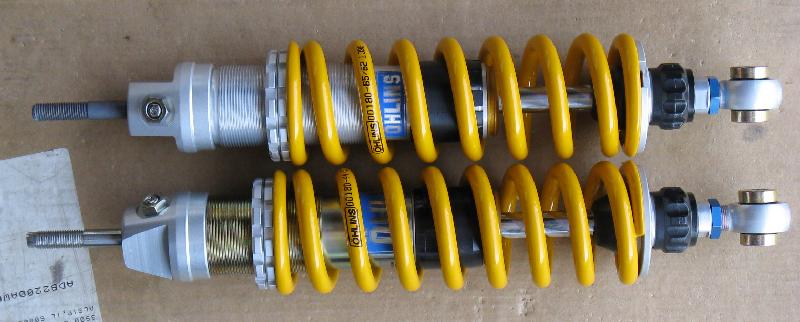


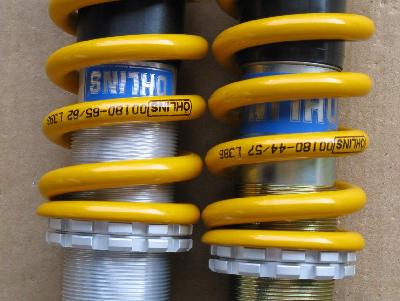
Yup.. definitely shorter.. and different spring numbers....notice also that the end of the stud is an allen wrench socket just like stock.. sweet...
How about the rears... In the below picture the Rock shock is on top... definitely longer... looks like the same spring...

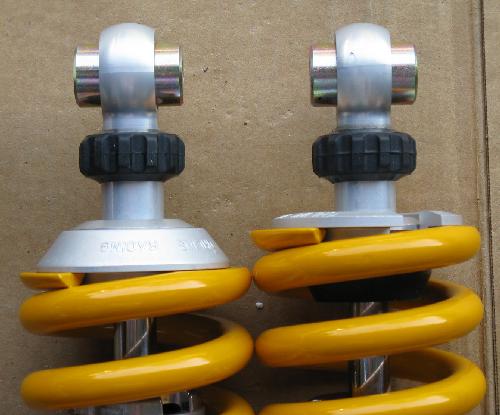
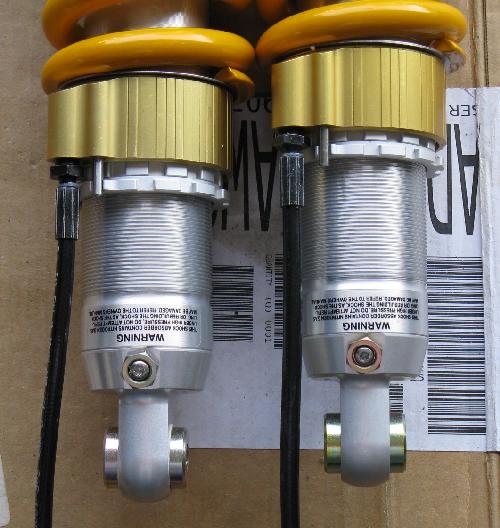
Alright then, let's get on with the installation.... Get the bike on the jack and make sure there's some room under the front wheel. Unbolt brake coupler to get more slack in the brake lines. .

Bike is on the jack with wood supporting the front wheel... Unscrew the top nut on the front shock...
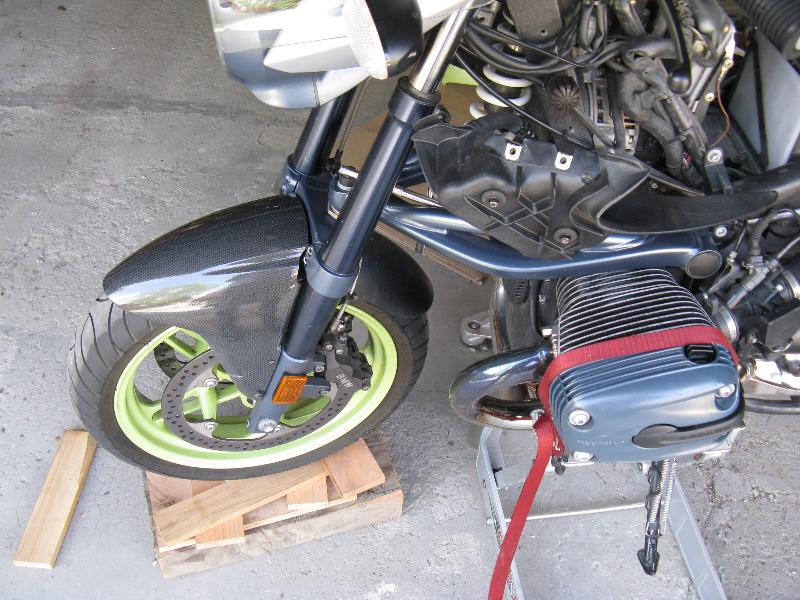
Then the bottom nut and screw... 15mm on left... 10mm hex socket for the "torx" bolt head...
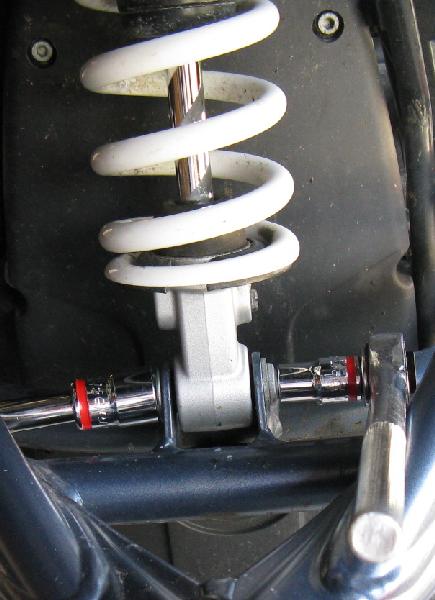
Jack up bike or remove wood as needed to get space to remove shock... Plenty of room, no problem...
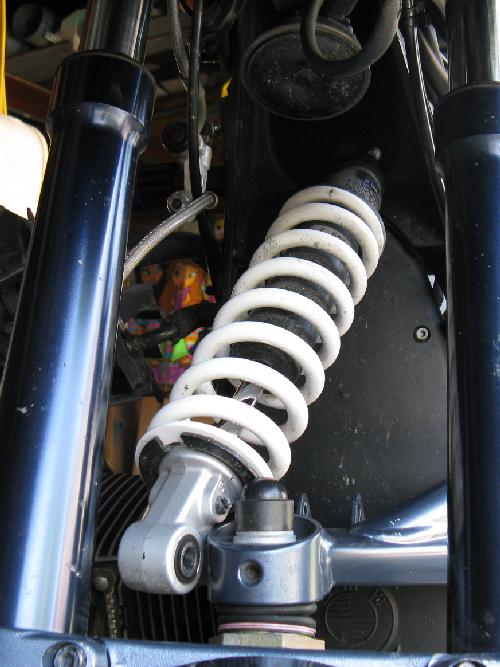
So, how does the Ohlins Rock shock compare to stock...
 \
\
Looks like fewer coils...
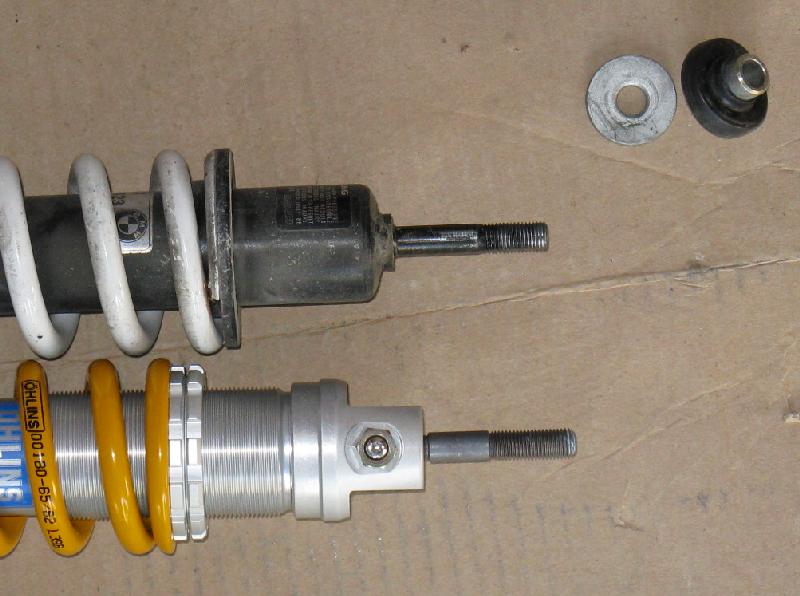
Ohlins is definitely longer than stock... Good, I was hoping for that... and I have more adjustability to increase length... Notice the length adjuster is screwed in all the way...

There she is... slipped in place with bolts finger tight...
I then tried to screw the brake coupler back in place and found that the brake line was pretty tight at full lock left... So, I turned my attention to the splitter over the front fender... notice the left brake line is tight against the fender and the right one has room... If I could move that splitter over about a half inch I could get some slack in the line...

So what do we have... one screw holding the bracket on and a locating indentation... I took the splitter off the bracket and the bracket off. That little allen screw was on tight. Locktite...


And here it is after I drilled the hole...

And here it is in place, using the second hole...
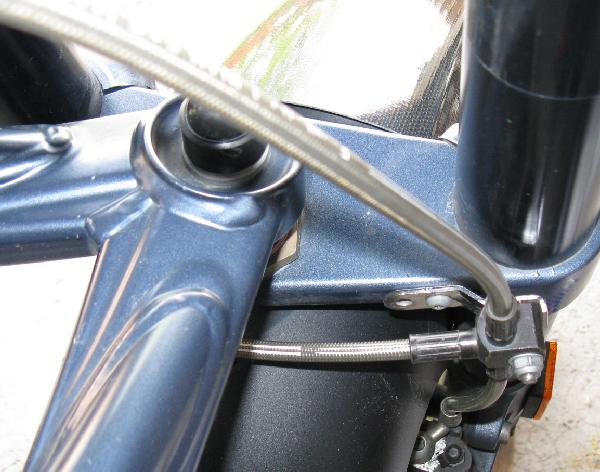
Definitely increased the slack to the brake line... It does touch just a bit at full lock to the right... but that's no problem...

Torque it all down and move on to the rear... Let's see how they compare...
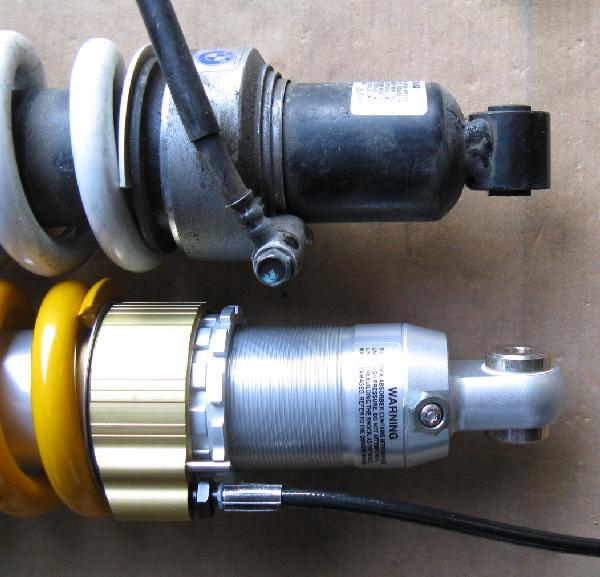
Real close... Looks like maybe half a coil more on the Ohlins, and spring wire looks thicker... Both are at full preload...
Had the same problem with the preload adjuster bracket as before... this time rather than drilling the hole bigger I just took the corner to the grinding wheel. No problem fitting after that...
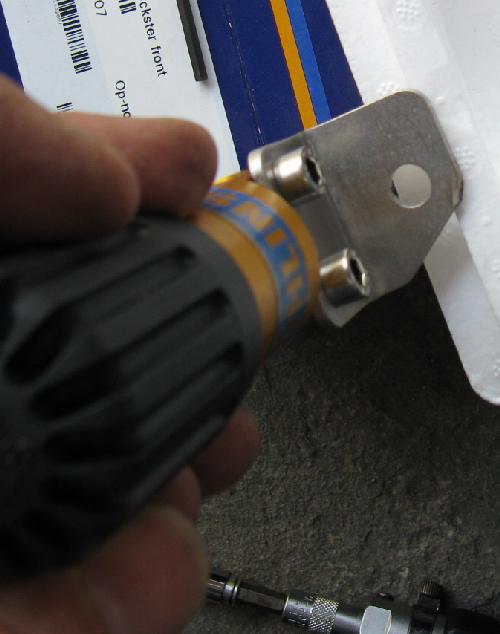
And there it is...installed and torqued down... This time I didn't have to monkey with the hose either... orientation was just fine; away from swingarm and away from exhaust... but I do think this one is a bit longer than the R1150R hose.

And... guess what... no clearance under either tire when the bike is on the center stand... works for me... more ground clearance.
5/6/08 Ride Report
Well, been busy, but couldn't wait any longer, had to take it for a short ride. Went and found my favorite bumpy road and S-ramp... Rear feels about the same as the R1150R Ohlins. Front is firmer than the R1150R Ohlins... feels even better... just the right level of control and compliance... responds to small bumps but doesn't bottom over large ones. What mid corner bumps?
It's like this... before, every bump I went over I could feel... the suspension moved but the bike bucked also... Now, the bike stays level and the wheels move up and down under it... as it should be. Even my CBR1000RR, with the state of the art fully adjustable suspension on both ends never felt like this.
I tend to be the kind of person that hates to part with my hard earned money... and then when I do, I generally have second thoughts about whether it was worth it or not... Mr. Buyers remorse... I can already see I will never regret this purchase. I'm just sorry I never bought Ohlins for my previous bikes. My body would have been subjected to countless fewer jolts and shock over the years, while still allowing me to maintain the sharp handling that I prefer. Yes, you can have controlled and compliant at the same time... Imagine that... shock absorbers that absorb shocks... what a concept... Ssss-weet!
5/18/08 Two Up Rides
Well, took my oldest daughter for a 5 hour ride to Starved Rock State Park... which from here involves some city, some blasting on I-80, some really bad bridge expansion joints, some pretty bumpy back roads. She's 5'11 and proportioned... so I'd guess she's in the 175 range... and me at 215... Cranked the preload and rebound most of the way up. The ride difference is definitely noticeable. She said the bike seems more steady during stops and definitely smoother over bumps... Only the big bumps are bothersome, but even they are not as harsh as they use to be. Also took the wife around for a bit... took her on some bumpy S's in one of the forest preserves near our house. She agrees, noticeably smoother and less harsh. Also took the youngest son... midget... for a ride... He barely weighs anything. After riding around with him on the high preload and rebound settings I stopped for gas and adjusted the suspension down. It's amazing just what a difference the adjustments made... ride went from obviously over sprung and damped to luxuriously compliant. Impressive.