2015 DR650S Mods
I'm going to talk about the mods on the bike in prep for the trip.
But first let me say something about this bike in general...
Daaaaajjjjmmmnnnn! I've owned a few bikes, but riding this think is
just a pure pleasure. Light, agile, soulful, can cruise at 70 all
day if need be... and consistently 66 mpg. I think I like doing
corners on this thing better than I did my CBR1000RR. Just saying...
where has this thing been all my life?
Here are the mods I made, and the prep I did, to the bike for the
trip:
- Seat
- Wind screen
- Center Stand
- Heated Grips
- Heated Gear
- High Output Stator
- Neutral Sending Unit Fix
- Acerbis 6.6 Gallon Tank
- Front and Rear Suspension
Seat
Ok, first thing. The stock seat sucks. All stock seats suck. Well,
at least every bike I' ve owned except for the BMWR850R, which had
adjustable height and was shaped like a saddle. Apparently somewhere
along the way bike designers thought appearance was more important
than comfort, which is why there is such a big seat aftermarket out
there. Well, I got tired of the monkey butt and dishing out hundreds
of dollars for aftermarket seats that still sucked, so years back I
started modifying my own So, here we go... tadaaaa!:
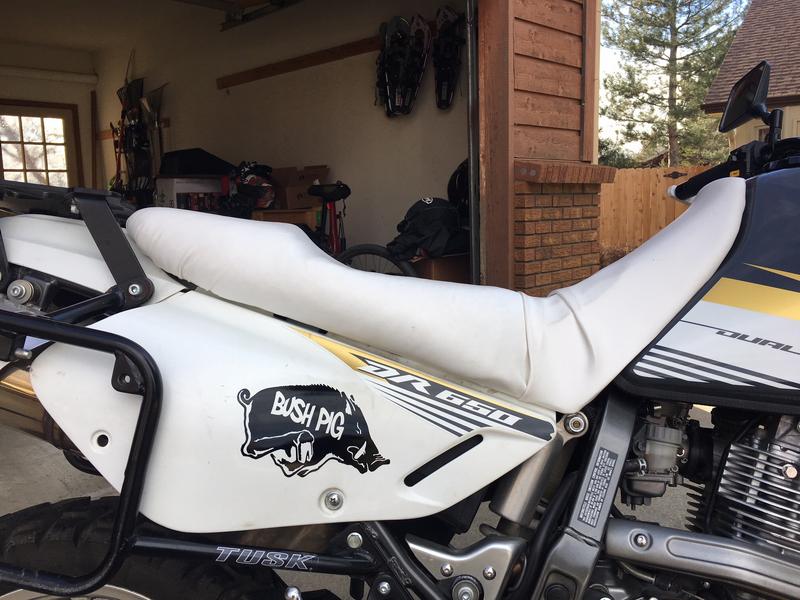
This seat doesn't suck now. Because it's about 3-4 inches wider than
stock and about as flat as I could make it without cutting into the
seat pan. Why is that important? Because if your seat is sloped
forward, you're going to slide forward, your skin stretches, and you
get monkey butt. That's ok if you're out killing the trails and
moving around, but not on a bike that you need to sit on all day
maybe. Ok, it's not pretty, but it's a single piece of vinyl. It's
functional. Why is it white? Because when I leave it sitting out in
the desert sun I don't want it to burn my butt when I sit on it.
It's a real all day seat now, even for my 6'3+" 200 lbs. Totally
supportive.
Wind Screen
After my first ride on the bike I clearly needed some kind of wind
protection. I considered one of those full rally fairings, but it's
just more plastic to crack up, and I didn't want to block that much
air. Most of my riding will probably be in warmer rather than colder
temps... if I time it right. So, after some research I settled on
the Bajaworx screen. I actually took the headlight cover with me to
IL in July, installed the screen there, and brought it back in
August to just bolt back on. I'm pretty happy with it. Takes
the blast off the chest and the air coming at my helmet is
reasonably smooth and also takes some of the pressure off there.
Some low amplitude buffeting, but not too bad.

And I even almost drilled the holes symmetrically!
Center Stand
The next obvious update was a center stand. Why bikes are sold
without center stands I don't know, especially street bikes.
Arguably the CR is more dirt than street. But a center stand
makes it a lot easier to do repairs, change tires, lubricate the
chain, fill it with gas... Apparently SW-Motech is the only game in
town so ordered it while I was in IL and mounted it up when I came
back to Colorado in August.
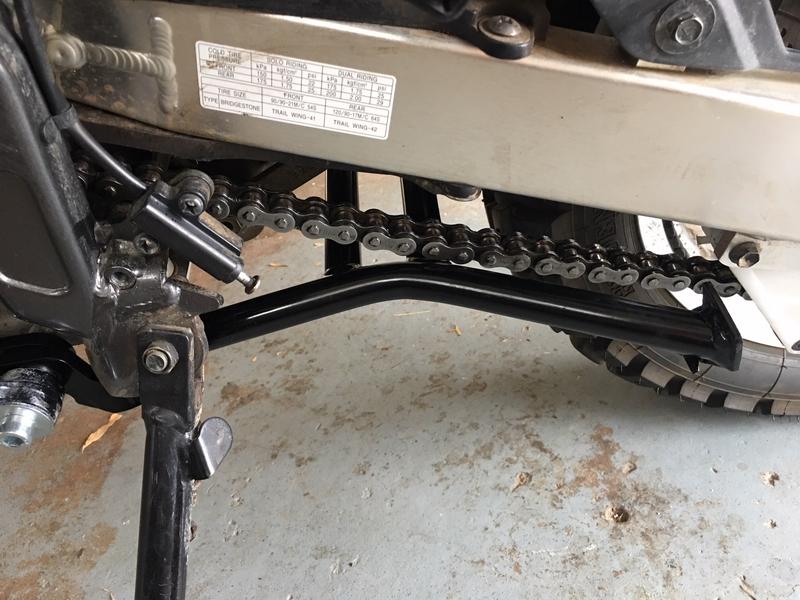
By the way, the instruction for installing the stand could use a
little work. But if you stare at it long enough you get there.
Then I said to myself, dang, that's a little close to the chain. I
get the photo is at full suspension extension, but the chain barely
cleared, and by pressing on it, it would touch. So, took a close
look at it and noticed that the stop was just the head of an Allen
bolt on each side. So, got a thin piece of metal I had laying
around, about .030-.040 and Crazy Glued it to the bolt head (think
it will hold? guess I can weld it if not ) but that little fix puts
about 3/8" between the center stand and the chain. Perfect.
I read that some people had issues with the center stand because it
has no lever on it to help leverage the bike up. I don't have any
issues with it. Put it down, put your toes behind it just to keep it
on the ground and hoist. Yeah, a lever to really step on and
leverage would be nice, but doesn't seem necessary with a bike
that's relatively light.
Heated Grips
Next major thing. Staying warm. First the hands. I tried some
generic Hippo Hand kind of things, that just wrap the bars and your
hands. I read some reviews and people were saying how great
they were. For me they lasted about two miles. Although the entry
ports had a hard insert that keeps their shape to you can quickly
get your hand in and out, I found that it wasn't quite that smooth.
Just putting my helmet visor up and down was a distraction. My hands
would get caught as I moved it in and out. Also, it was tight in
there. Working the turn signals was a pain, my thumb would get
caught. I'm guessing part of the problem is my XXL hand size. I
don't know, maybe they would work for someone with smaller hands?
Definitely not for me. Your mileage may vary.
So, decided to go with some heated grips. I've had them on a couple
of the BMW's I owned and always like them. It's amazing how
warm hands can make you way more comfortable in general so got some
Oxfords. They seemed to have a good reputation and they come with
this intelligent control that detects when you're not moving and
will ramp down the power so you don't kill your battery when not
needed.
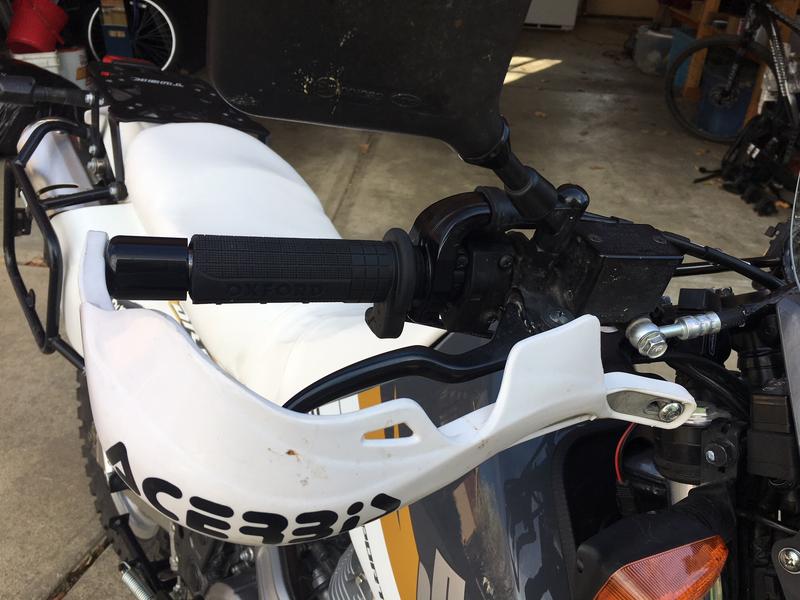
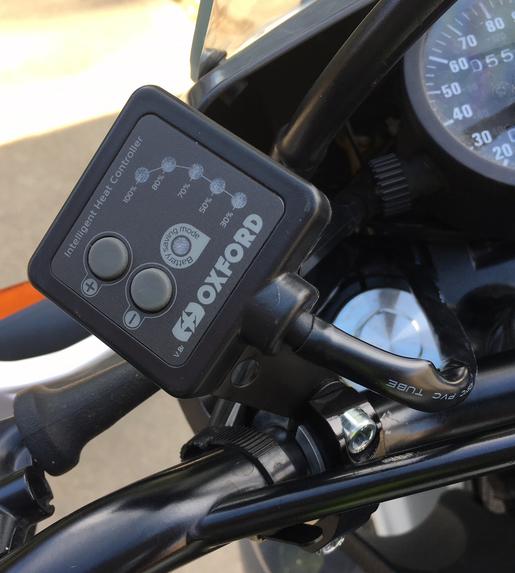
And you just hit the + - buttons for more or less juice. Slick. In
like 40 degree temps (F), at 50 or 70% setting, even with perforated
leather gloves on (armored road race gloves) the hands stay toasty.
I think I'll still take a pair of heavy mittens for the really cold
stuff, just in case.
Heated Gear
Couple years ago I also started using a Tourmaster heated vest.
Makes a huge difference when it comes to being comfortable in the
cold. Still had that, so wired up the bike for it. I
Took a ride up to Estes Park Colorado, about 31 degrees, my upper
body was pretty comfortable with some layers and the vest was only
on #3 setting. The legs were another story, even with a base layer,
pants, and good rain paints over it to cut the wind, I could feel
it. So, purchased some heated pants as well. The first one's
were more like chaps. I wasn't crazy about them because the
heat just didn't seem to be noticeable and and with the vest and
pants going I actually blew the controller fuse. That had
never happened with just the vest, so went and bought a pair of
WarmGear pants. Test riding them in cold weather I'm not crazy
about them. Just don't feel the heat like I do with the vest,
but they are heating, because I am comfortable with them. Guess
there's a lot more heat being sucked away at my legs than my torso
with multiple layers and a jacket.
The WarmGear pants actually ended up blowing my heated gear fuse, so
decided to return them and went with Gerbing. A couple test
rides and they seem to be better; I can definitely feel the heat
more.
High Output Stator
With all this electrical paraphernalia we're going to need some more
power! The good thing is the previous owner put an LED headlight,
I've put in an LED tail light on the bike which reduces the
electrical load, so that helps. But better safe than sorry. I
wasn't particularly liking the prices on stators from the usual
sources. I ended up finding RaceTech Electric in Loveland CO, like
45 minutes from me, and they sell on EBay. Way better pricing and a
local US company. Totally plug and play and they even throw in some
extra connectors and pins in case you screw something up. Ordered it
and got it in a couple days.
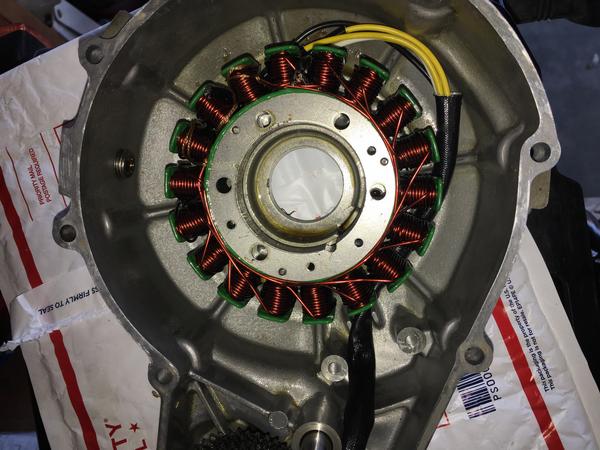
As I was going to install it, I couldn't figure out what was with
the wires? In one position there was way too much slack and the
other one the wires were tight. The holes to mount it only lined up
in those two positions. I gave RaceTech a call and they explained
it's just the position of the rubber grommet. Down just off the
screen in the above photo is the rubber grommet where the wires pass
from the case. By sliding one wire at a time through it you can take
up all that slack. And I had to, or the wires would be too short to
reach to their plugin point. Figure I'll probably just bring the old
stator with me as a spare, if there's room. I also bought a spare
voltage regulator. I read some concerns that pushing the electrical
system past it's design may overheat things. But I figure, when will
I be pushing the electrical system, when it's cold out! Again,
better to have some spares then be stranded somewhere.
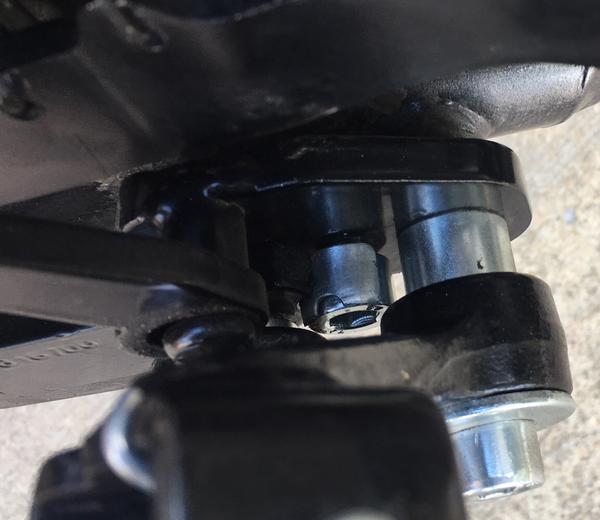
Neutral Sending Unit
And as long as I had the oil drained and was opening cases, I opened
the other side and did the Neutral Sending Unit fix. The
sensor that detects the Nutral position apparently can fall out so
the Netral light won't work, but more importantly you have loose
screws in your case... not good..., so I put some Loctite on the
screws. The bolts require 2 ft-lb or torque. No wonder they tend to
fall out.
Acerbis 6.6 Gallon Gas Tank
So, yeah, I went big. I've toured through the US and I've actually
been 200 miles between gas stations, figure on a world trip who
knows where I'll end up and where the gas will be. First I looked at
just buying the gas cans with the center mounts, but by the time I'd
add significant capacity they're getting big and expensive, so why
not just make it neat and put the money toward the big tank?
First thing that confused me when I got the tank was that there were
screw holes on both sides for petcocks, but only the left side was
drilled, and only one petcock came with the tank. From reading other
threads apparently some gas will get trapped on the right side, or
maybe not?, but just "lean the bike over to get the last of it".
Hmmmm... anyway, I installed it with the one petcock supplied and
put in a question to Acerbis via Parts Giant on Ebay regarding
exactly how much gas will get stuck. The answer was the two
petcocks are not needed to drain the tank completely. Not sure
that's the right answer, but if the worse thing is that I have to
lean it over, ok.
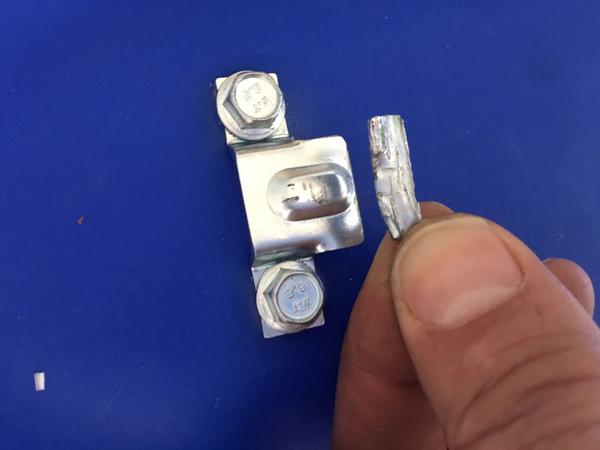
I put the tank on the bike just to see how things will line up and
ran across the turn signal clearance problem. Again read some
threads talking about swapping left and right side brackets, but for
me it wasn't good enough. With the Acerbis bark busters in place,
just swapping brackets caused and interference problem, so had to
get some 1.5" longer bolts, then the question was how do I get a
spacer to take up that extra 1.5"? I'll let the pictures speak for
themselves. I call them Frankenstein bolts... and nuts...


The nuts are not screwed on, they're just the next size up and slip
on the bolt. The disadvantage, or advantage, here is that with the
brackets swapped left to right and spaced out, they don't lock into
the triple clamp, so if you whack the turn signal hard, you can
rotate it back.
I got the tank in place and tried the seat... no go. The seat was
about 1" from lining up with the mounting screw holes. The problem
is the metal bracket on the tank vs the plastic slot on the seat
it's suppose to slide into. The portion of the bracket that slides
into the slot on the seat is too wide to fit, and after filing some
material off the sides, found out it was also too long, so had to
take a chunk of the bracket off, and also had to downsize and open
up the plastic slot.
Half modified plastic slot on seat:
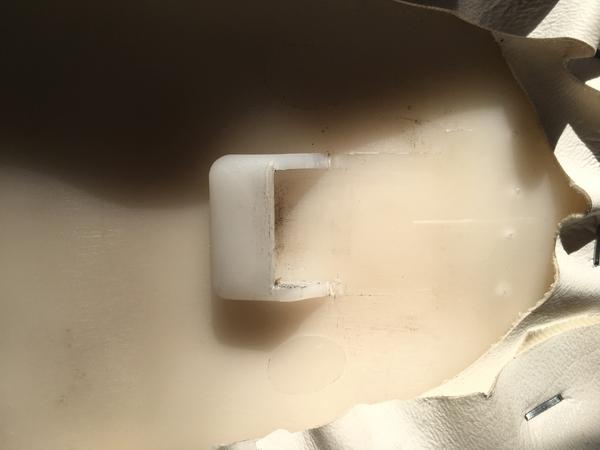
Then what I finally ended up with:

And the seat mount screw holes almost line up now... but close
enough to just push in place while installing the screws.
Also added an inline cleanable gas filter. Figure that, along with
the strainer already on the petcock, and the small filter in the
carb inlet and I should be able to keep junk out of the carburetor.
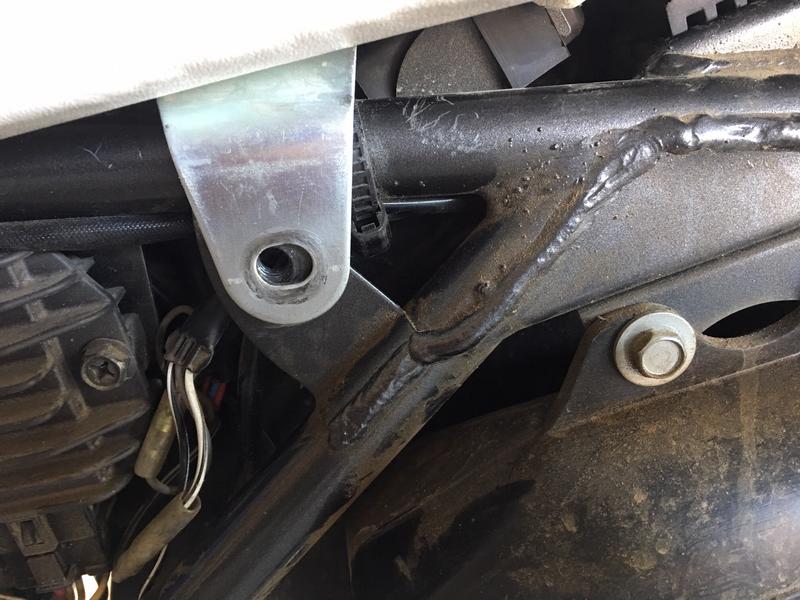
Other than the turn signals, the clearance around the tank seems
good. At full lock the front brake line bracket comes very close, so
bent it back a little. On the other side it's close to the oil
cooler but about 1/2" so not bad. If the tank gets whacked it will
probably make contact but there seems to be enough give in the
cooler mount that it should deflect... famous last words.


Though after thinking about the filter and the hose. I put on a
larger section of hose and looped it into the carb side. With the
short sections of hose it's pretty stiff and might transfer too much
vibration from the engine into the petcock, and since the petcock is
screwed into plastic, I don't want to push that.
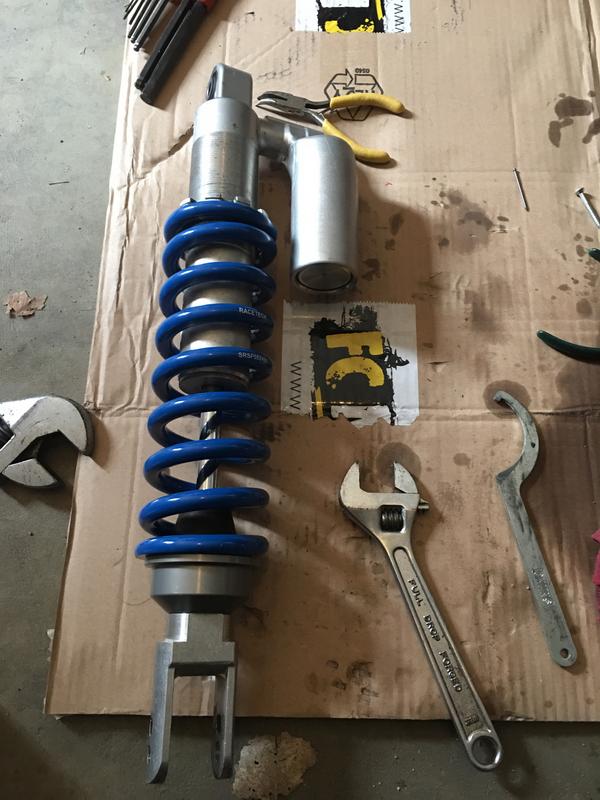
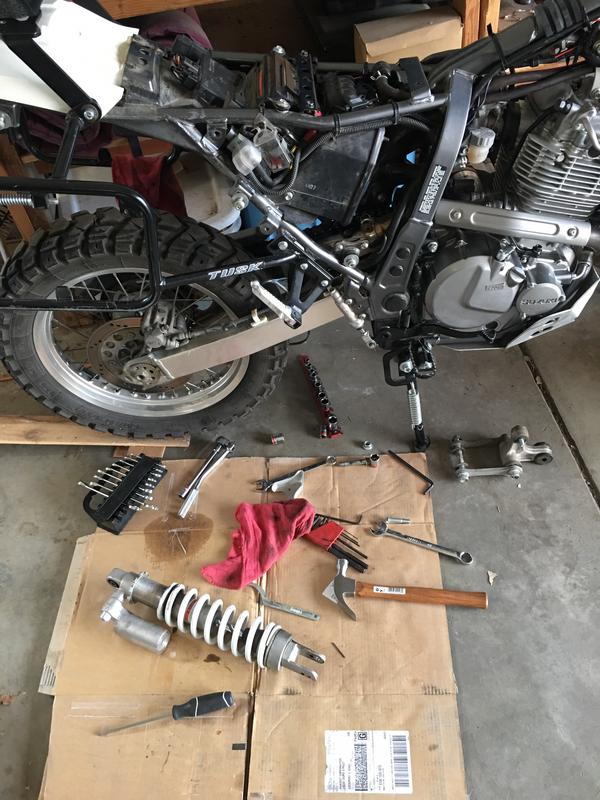
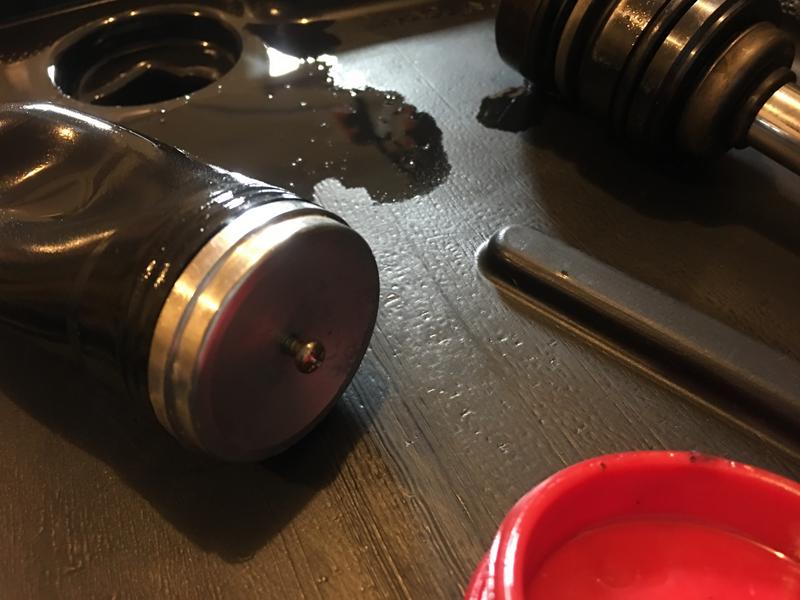
Front and Rear Suspension
The stock front springs are progressive and about .5x kg/mm or so. I
replaced the front springs with .70 kg/mm springs and 10w oil with
minimal preload, and oil level 6.5 inches from the top. I think the
stock oil is a 3w.
The rear shock was fun. I'd never rebuilt a shock before,
what's nice is that the DR650 shock is very easy to work on.
At first I took it out of the bike and was ready to start working on
it but the reservoir was a bit of a surprise. I was looking at
rebuild instructions (https://procycle.us/info/guides/dr650/shock-build.html)
that had a Schrader vale for pressurization but all mine had was a
tiny hole. So, put the thing back together and called it a
day.
Researched it and found out that you actually use a needle which
punctures through a rubber block, just like using a syringe to get
medicine out of an ampule, so ordered a needle. Ebay had it
for $14. Others were ridiculous. And it came in less
than a week.
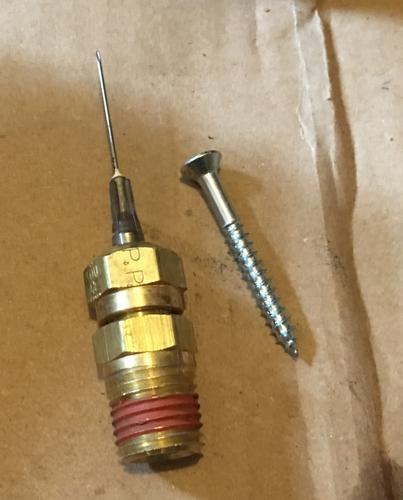
Step one, insert the needle though the hole to relieve the pressure
in the shock. That allows you to push the piston down, take
out a retaining ring and pull the piston out... ah... pull the
piston out? With a tiny hole? The recommendation I read was to use
compressed air to force the piston out. Instead decided to
drill the hole just a little bigger so I could screw a small screw
into the hole and pull on the screw to get the piston up.
Worked like a charm. Pulled the bladder out and emptied the
oil from the reservoir.
Step two was unscrewing the preload collars all the way and taking
the spring off. New spring was 8.1kg/mm vs the old one which
was about 6.x. Then unscrewing the lower mount off the end of the
rod and removing the bump stop and large washer to get it all out of
my way.
I removed the end cap from the shock by inserting the tip of needle
nose pliers and just prying up, back and forth, a little at a
time. Seemed like a better idea than banging on the
thing. Once that was off, then the retaining ring, and pull
out the valve body and empty the oil.
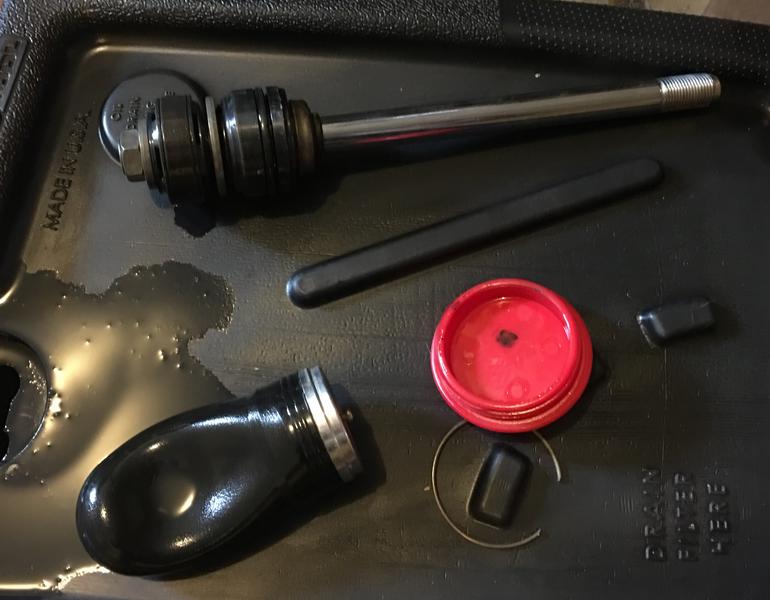
Refill and reassembly went per instructions, making sure that fluid
overflowed when inserting the bladder and the valve body.
After it was all together I found a local shop that could pump
Nitrogen in it for $20 and done.